Subscribe to our newsletter and get 15% off!
⭐⭐⭐⭐⭐ Customers rate it "VERY GOOD"
Purchase on account with Klarna 🧾
This is what is in demand
Most purchased products
Vendor: ShieldCraft Wallet
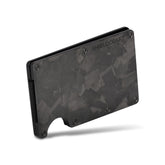
FORGED 12K 2.0
2 reviews
ShieldCraft Wallet 2.0 – Next Level Everyday Carry Description: The ShieldCraft Wallet FORGED CARBON 12K 2.0 is the logical evolution of our bestseller. With its optimized design, smart modularity, and high-quality materials, it sets new standards in minimalism, security, and everyday usability. Thanks to...
- €54,99
- €54,99
- Unit price
- / per
Vendor: ShieldCraft Wallet
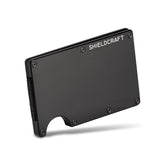
BLACK 2.0
2 reviews
ShieldCraft Wallet 2.0 – Next Level Everyday Carry Description: The ShieldCraft Wallet BLACK 2.0 is the logical evolution of our bestseller. With an optimized design, smart modularity, and high-quality materials, it sets new standards in minimalism, security, and everyday usability. Thanks to stainless steel...
- €46,99
- €46,99
- Unit price
- / per
Vendor: ShieldCraft Wallet
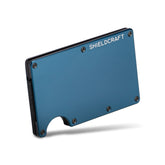
NAVY BLUE 2.0
1 review
ShieldCraft Wallet 2.0 – Next Level Everyday Carry Description: The ShieldCraft Wallet NAVY BLUE 2.0 is the logical evolution of our bestseller. With an optimized design, smart modularity, and high-quality materials, it sets new standards in minimalism, security, and everyday usability. Thanks to stainless...
- €46,99
- €46,99
- Unit price
- / per
0
0 items
Language
Currency
Instructions for use
Instructions for using your ShieldCraft Wallet
Inserting the cards:
-
Open your wallet in the middle and slide your cards (up to 12) into the card holder.
-
Make sure to insert the cards all the way in so they stay securely in place.

Opening the wallet:
- Use the finger recess to slide out and remove the desired card.
Using the money band/money clip:
- The money band and/or money clip is located on the outside of the wallet.
- Fold your banknotes in half and place them between the money band and/or clip.

RFID blocking:
- With the integrated RFID blocking function in your wallet, your credit cards remain safely protected from unwanted access.
Make adjustments:
- ShieldCraft Wallets allow customizations such as replacing rubber bands or other accessories. (Airtag Clip, Coin Master,...)
- Changing the money strap: Use the screwdriver provided to loosen the 7 screws. Now take the money clip and place it in the existing recesses. Now slide the unscrewed plate between the money clip and the wallet. Now screw the previously removed screws back in. Done!


Care instructions:
- Clean the wallet regularly with a soft cloth to remove dirt or fingerprints.
- Avoid contact with sharp objects to prevent scratches.
Safety information:
- Store your wallet in a safe place and protect it from extreme temperatures or humidity. Keep your PIN codes and other sensitive information safe and private.
Instructions for using your ShieldCraft Key Organizer
Insert key:
- To open the organizer, loosen the screw with the included screwdriver.
- Insert your keys into the slots or holes provided.


Arrangement of keys:
- Place the keys so that they are compact and neat.
- If necessary, experiment with the order to find the optimal arrangement.

Tightening the screws:
- After inserting the keys, put the washer back on and tighten the screw on the organizer.
- Make sure the keys turn easily for comfortable use.

Closure of the organizer:
- Close the organizer to keep keys safe and minimize any noise.
Make adjustments:
- Experiment with the arrangement of the keys to find the best configuration.
- Check the screw regularly to make sure it is tight.
Care instructions:
- Clean the key organizer with a soft cloth if necessary.
- Avoid contact with sharp objects to prevent scratches.
- Choosing a selection results in a full page refresh.


